Upgrading the Ultimate PC Interface (Version 2 and 3)
Software Instructions - software included in firmware package below
Download the lastest firmware bundle. You may be required to install .NET framework version 2.0 or you will get a non-descript error message. You may also need the Microsoft Visual C++ 2005 Redistributable Package.
Click on any image to see a larger version of it.
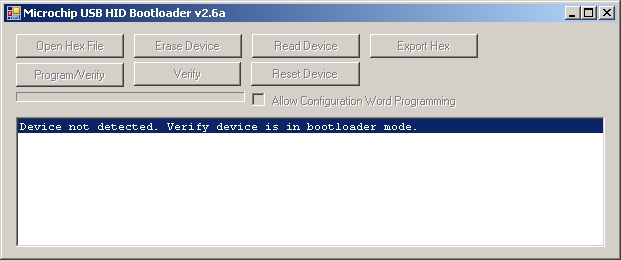
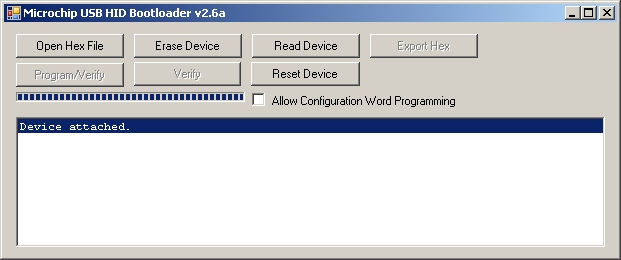
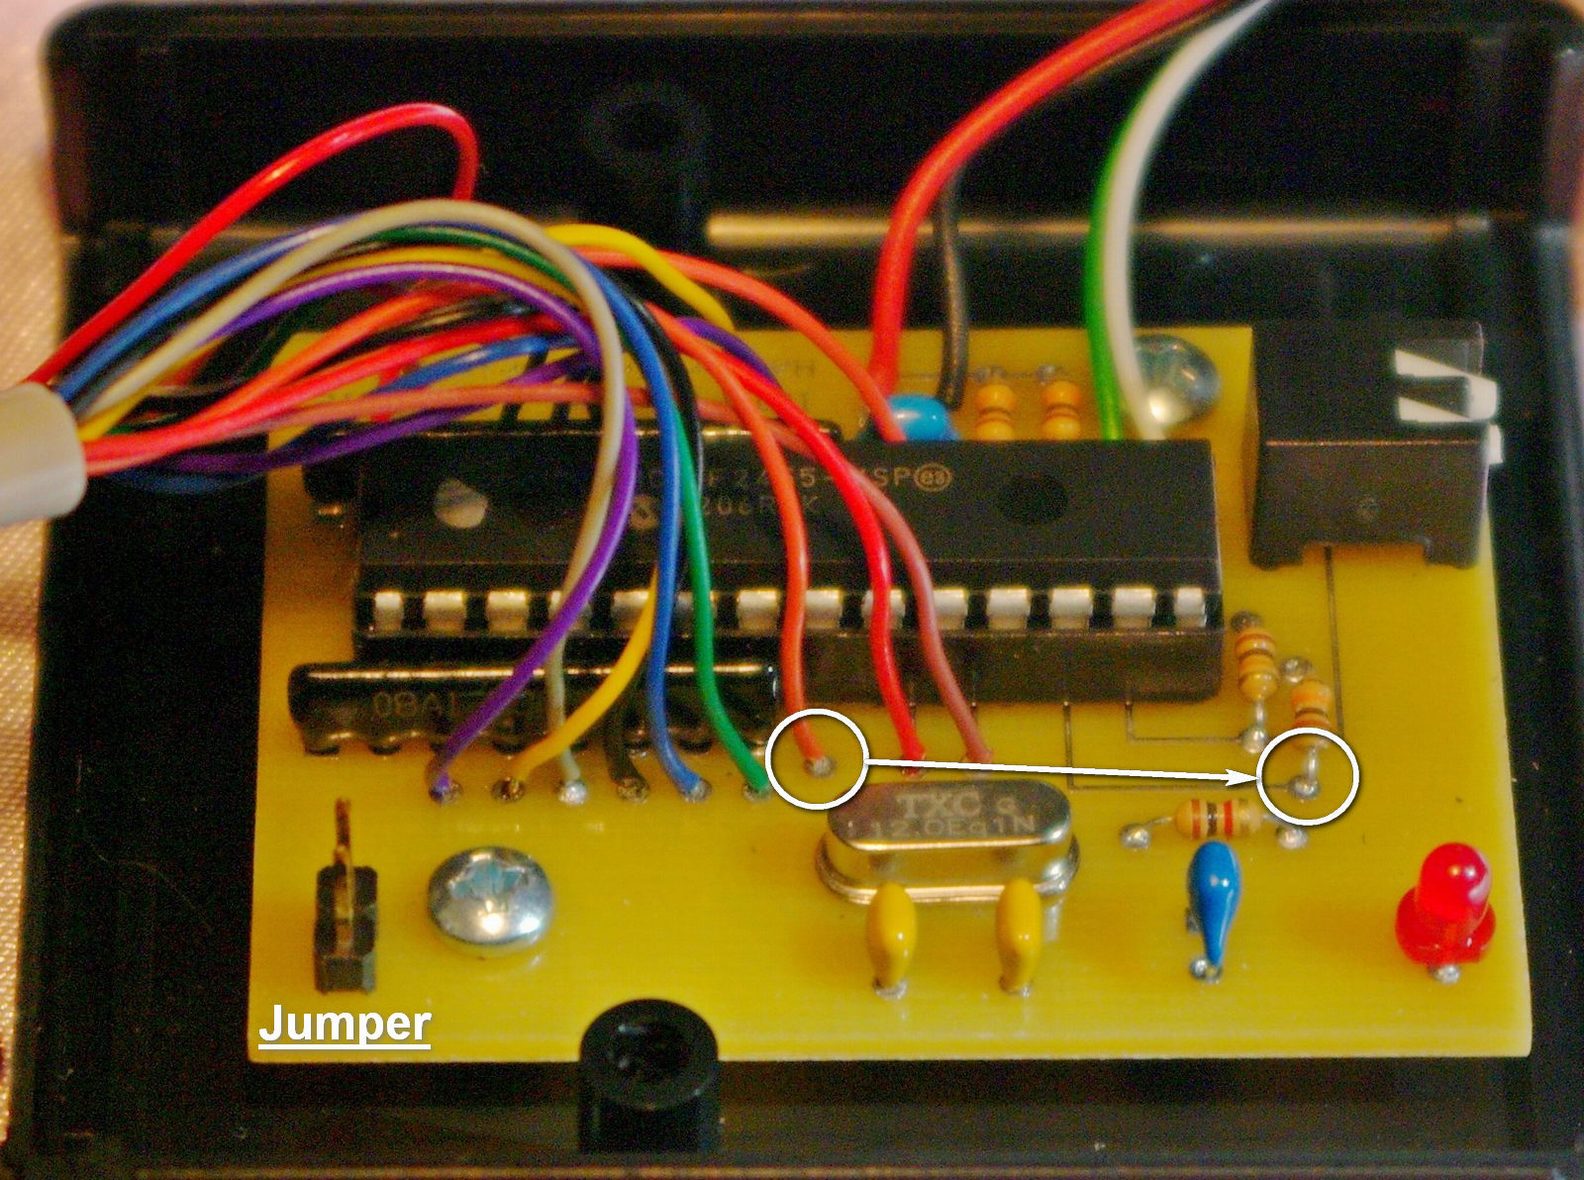
VERSION 2 UNITS: To activate firmware update mode, open the unit up by unscrewing the 2 phillips screws located on the bottom of the unit. You will see 2 pins located near one of the corners (see images below). Jump the pins by using the phillips driver. Plug in the USB WHILE the pins are jumpered. The Bootloader progam should now see the unit and the red LED in the unit will be flashing quickly. You no longer need to jumper the pins.
VERSION 3 Firmware packages
The ZIP file contains an executable program (Windows only) and a HEX file with a name similar to the date. Start the executable program with the interface DISCONNECTED.
- 2021/05/23 - Added support for:
Atari CX85 Numeric KeypadAtari Flashback 9/X w/ 4 special function buttons (Hold REWIND for Autsense)
Sinclair ZX Spectrum (Hold JOYSTICK DOWN for Autosense)
QuadTari (fire on joystick 1 for A, joystick 3 for B)
- 2019/06/02 - Added Commodore paddles support. May only work in MAME.
- 2019/04/07 - Stabalize boot up. Read the README in the ZIP file for special installation instructions.
- 2019/01/10 - Fixes and issue with 2600 keypad.
VERSION 2 Firmware packages
The ZIP file contains an executable program (Windows only) and a HEX file with a name similar to the date. Start the executable program with the interface DISCONNECTED.
- 2018/03/28 - The update is for Sega Master System - if extra buttons 3 & 4 are simultaneously pressed, PC joy button #12 will also come on.
- 2018/01/01 - Fixed a bug where the interface might not remember the last controller. See README.TXT in ZIP file. Units purchased after 01/01/2018 have this firmware installed.
- 2016/03/15 - Added support for Fairchild, Odyssey, MSX, and x68000. See README.TXT in ZIP file. Units purchased after 03/15/2016 have this firmware installed.
- 2015/12/01 - Upgrades your 2012/13 unit adding remembering the last controllers used in Autosense Mode. Units purchased after 12/01/2015 have this firmware installed. Autosense mode detect keys have changed. See Interface homepage for more information on all the controllers supported and autosense detect.
- 2015/02/01 - Upgrades your 2012/13 unit adding additional keys on the Colecovision controllers to support emulator features. Units purchased after 02/01/2015 have this firmware installed. See Raspberry Info for more information on keys.
- 2014/12/01 - Upgrades your 2012/13 unit adding additional keys on the Intellivision controllers to support emulator features. The Intellivision Flashback controller is the default controller for Autosense mode. Units purchased after 12/01/2014 have this firmware installed. See Raspberry Info for more information on keys.
- 2014/10/01 - Upgrades your 2012/13 unit adding Intellivision and Colecovision Flashback controller and removed Sega Master System and Genesis 3/6. Units purchased after 10/01/2014 have this firmware installed.
- 2013/05/26 - Upgrades your 2012/13 unit adding the below plus Sega Master System joysticks which supports the Commodor/Amiga digital joysticks. Press the START button in AutoSense mode. Units purchased after 5/25/2013 have this firmware installed.
- 2013/04/01 - Upgrades your 2012 unit adding Colecovision and Atari support. Keypad button 1 are mapped to 9 for the Intellivision and Coleco controllers.
CAUTION - READ FIRST - CAUTION - READ FIRST - CAUTION - READ FIRST - CAUTION - READ FIRST
Not everyone is handy with a soldering iron or comfortable opening up the unit. Please CONTACT US if you want help upgrading your unit. We are NOT responsible if you damage your unit.
Upgrading the 2012 units (VERSION 1) to include Colecovision and Atari support
Please CONTACT US if you are are not comfortable with a soldering iron.
To upgrade your unit, you will need to relocate 2 wires prior to applying the firmware upgrade.
There is an ORANGE wire coming out of each DB9 section. One wire on each side of the chip centered in the unit. Reference all the images below before proceeding.
The ORANGE wire on this side is always located in the same place as the image below. Move it to the resistor furthest from the chip as shown below.
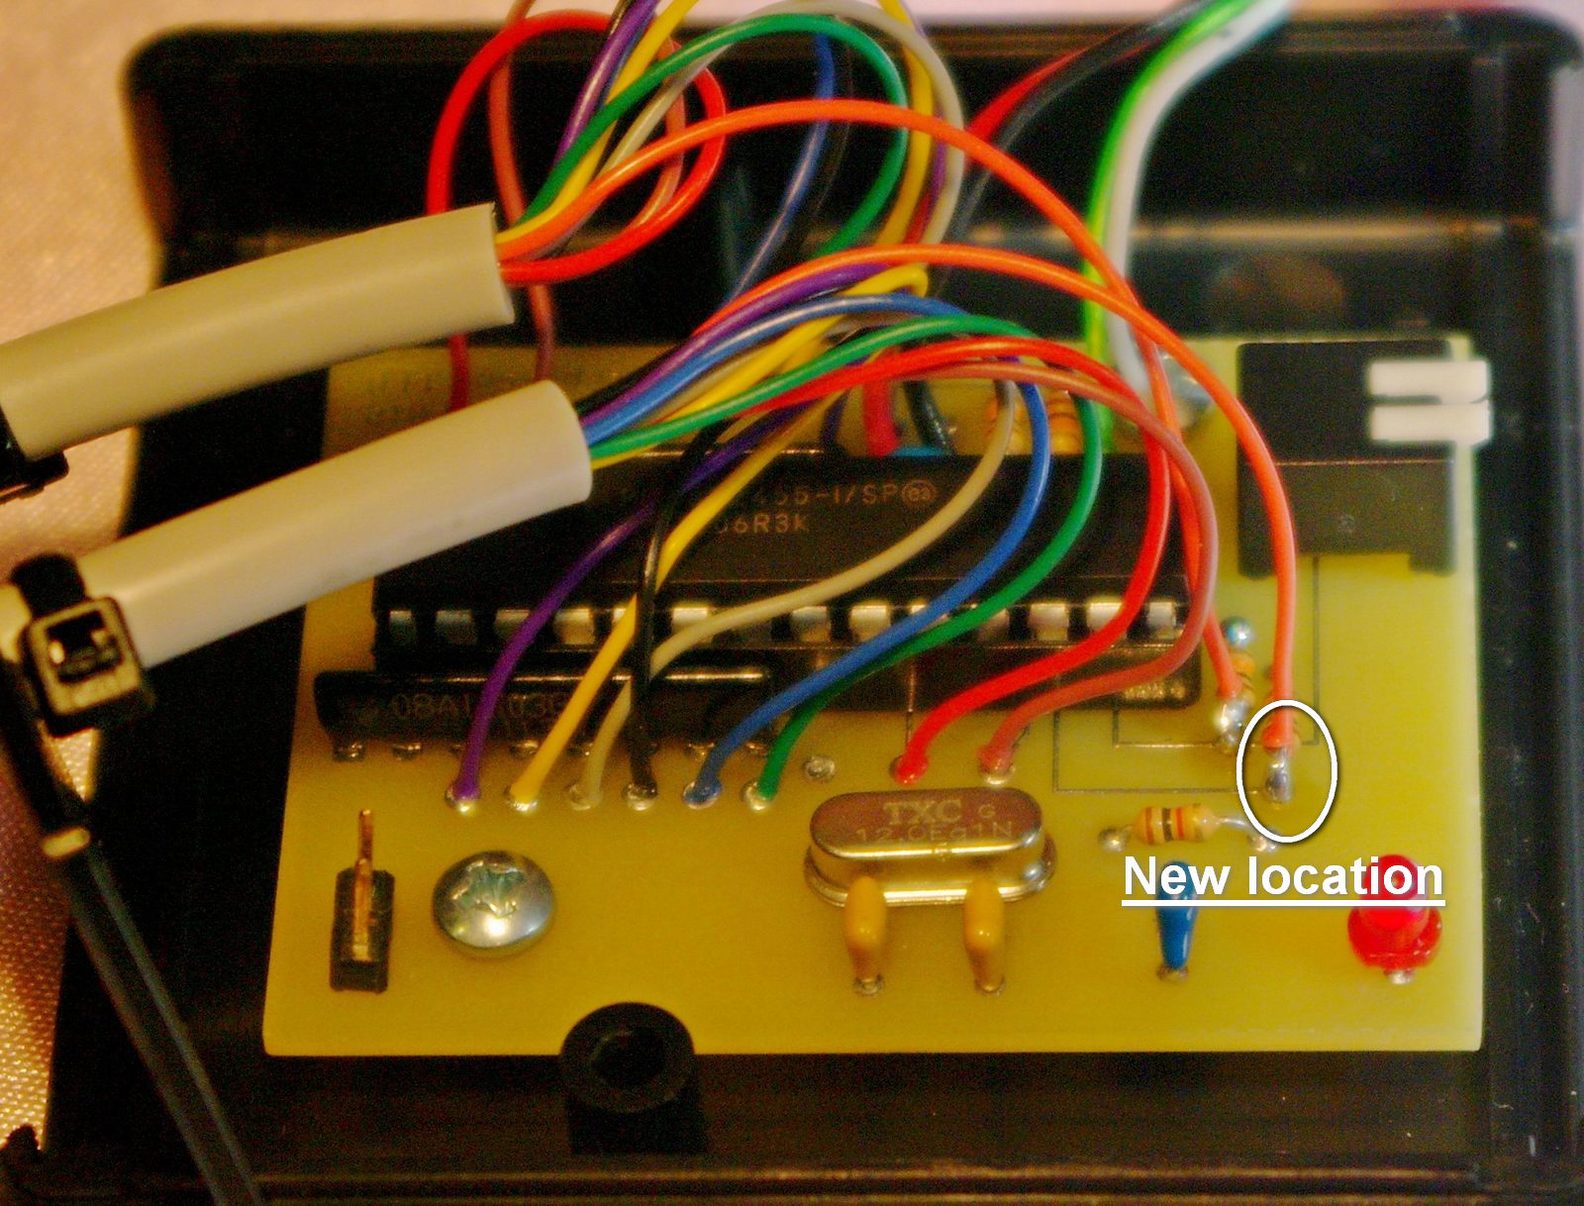
The ORANGE wire on this side may NOT be located exactly in the same place as the image below. Notice that the two images have the wire originally located in different locations. Move it to the resistor nearest to the chip as shown below.
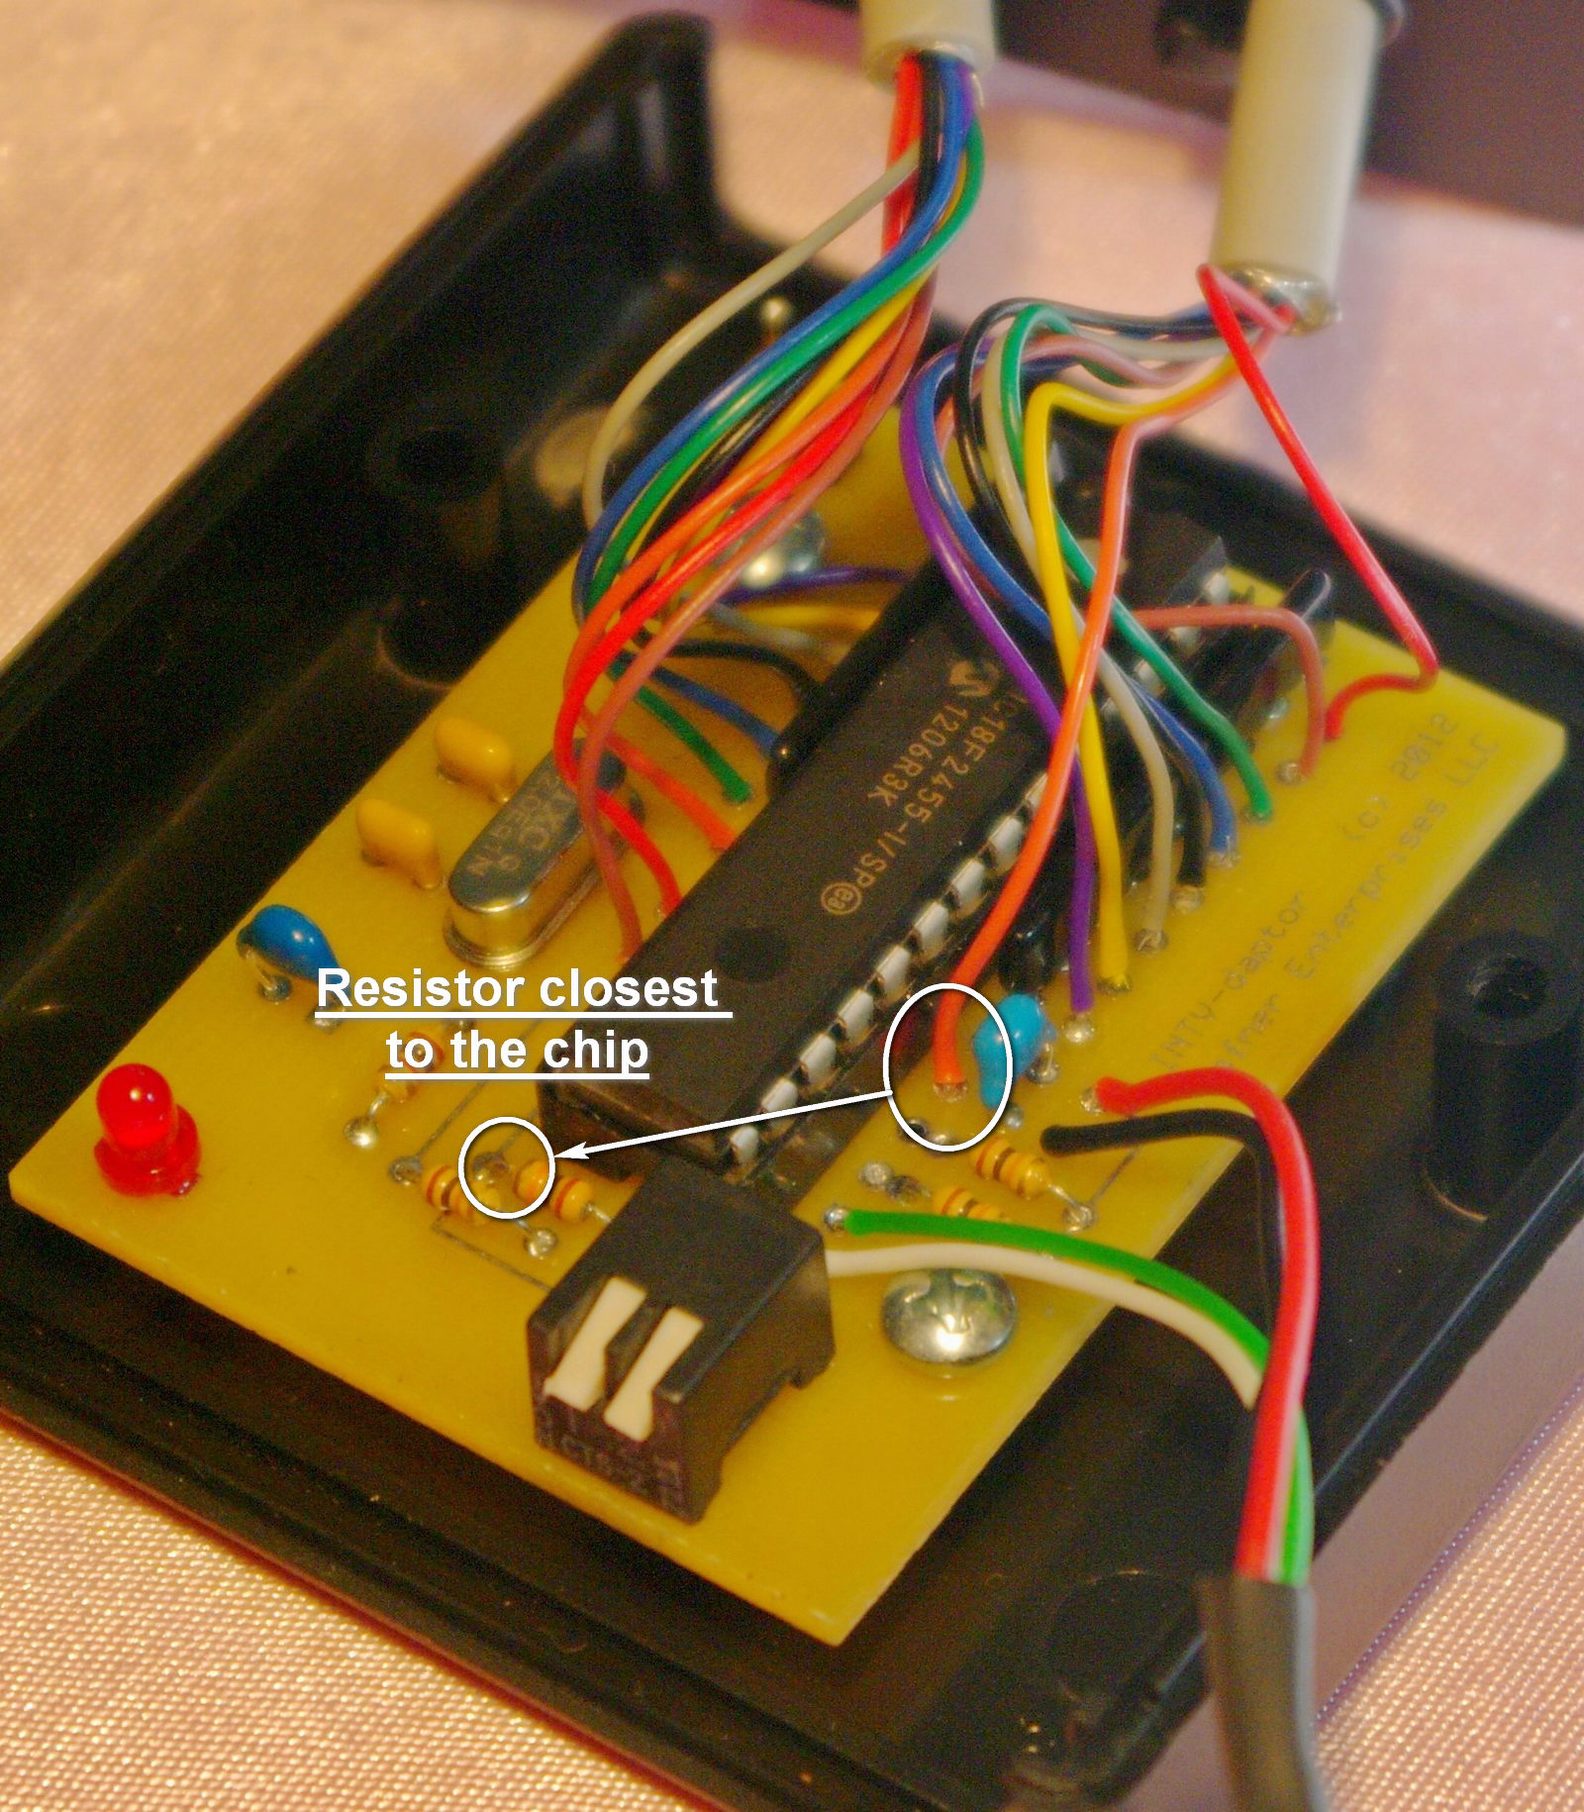

The BLUE and the GREEN wires need to be swapped. The BLUE wire ends up being on the side of the dip switches.

The location of the zip-ties on the cables needs to be checked. They limit how much the cable can pull out of the box, to stop the individual wires from being tugged and broken off the PCB. Add new zip-ties or relocate the existing zip-ties so that there is slack on the newly relocated wires.
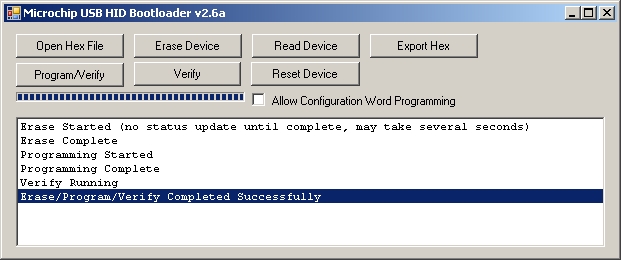
You may now perform the firmware upgrade available above.